


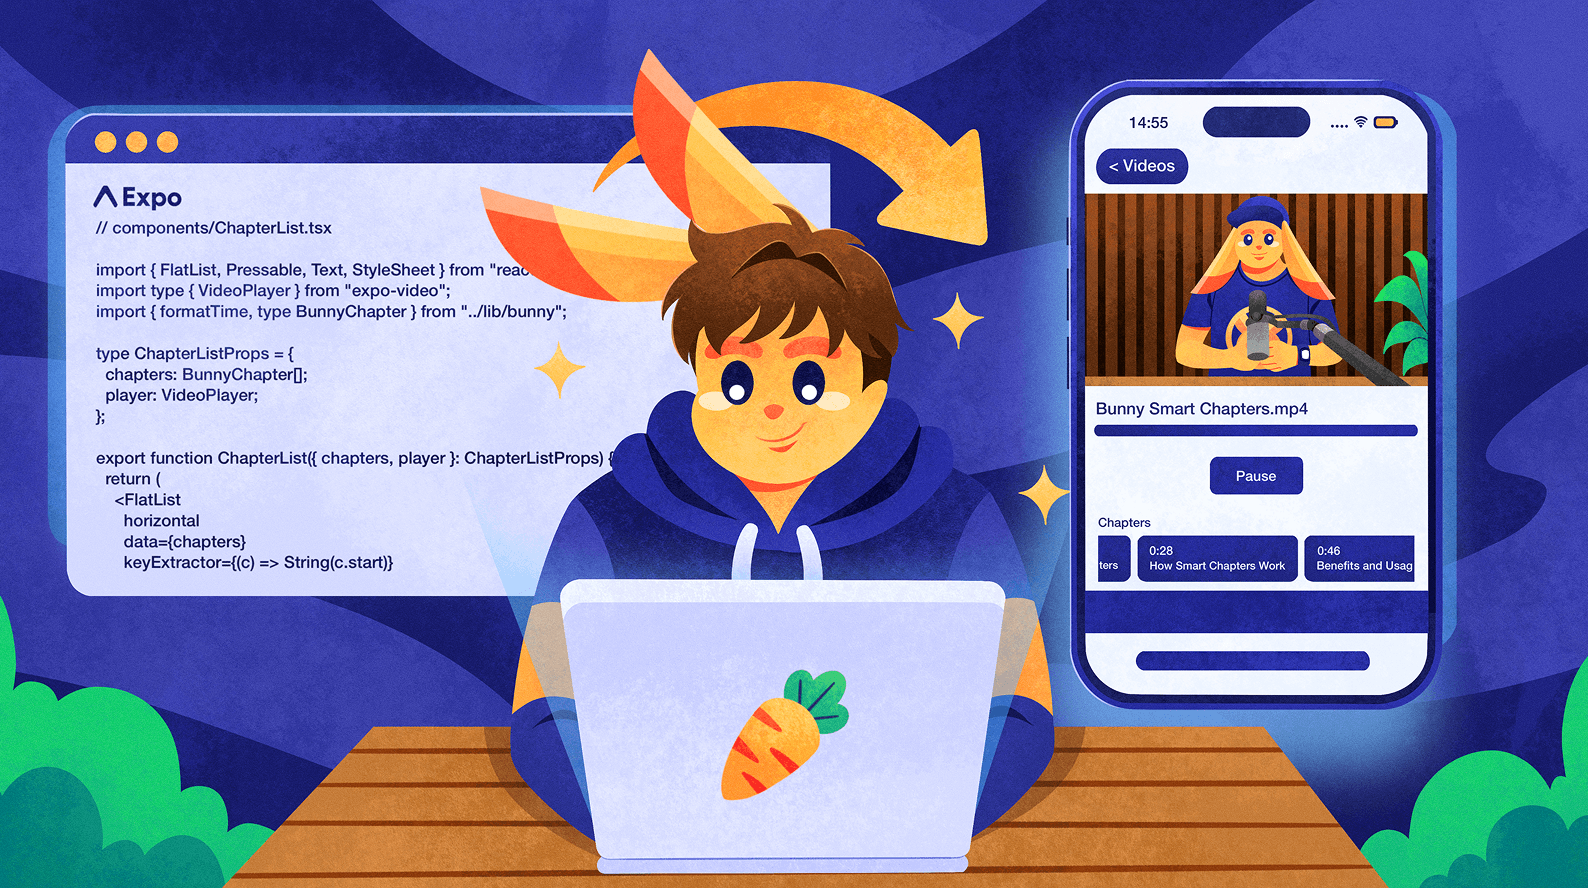
How to add native video playback to your Expo app with Bunny Stream

Jamie Barton

April 24, 2026
When integrating Bunny Stream into an Expo app, the easiest way to get started is to use Bunny Player.
Drop it into a
WebView
and you get adaptive playback, built-in analytics, captions, chapters, and branding out of the box. It is quick to set up, and for many apps, that is exactly what you want.
If your Expo app needs Picture-in-Picture, background audio, lock screen controls, or tighter playback control, the limitation is no longer the player; it is
WebView.
Unfortunately, the mobile OS will not float it for PiP or keep it alive like a native media session, and it will not treat it like a real platform media player.
That is where
expo-video
becomes useful.
By playing the videos HLS URLs directly through the native video stack, AVPlayer on iOS and ExoPlayer on Android, you can keep your Bunny Stream as your video backend while unlocking the native playback features a
WebView
cannot.
In this guide, we will build a simple but real Expo app that does exactly that… fetch your videos from Bunny Stream library, render a video list, and open a detail screen that plays videos natively with chapters, captions, and playback progress tracking.
Before you start
You’ll need:
- An Expo project (SDK 52+) with Expo Router and Expo SDK 52 or later
- A Bunny Stream video library with at least one uploaded and processed video
- Your Pull Zone hostname,
vz-abc123-456.b-cdn.net, found under Stream > API in the bunny.net dashboard - Your Bunny Stream API key, used only in the edge script
Setting up
Install
expo-video
and
expo-image:
install expo-video expo-image
To enable Picture-in-Picture and background playback, add the
expo-video
config plugin to
app.json:
"expo": {
"plugins": [
[
"expo-video",
{
"supportsBackgroundPlayback": true,
"supportsPictureInPicture": true
}
]
]
}
}
expo-video
requires a development build. It won't work in Expo Go. Run
npx expo run:ios
or
npx expo run:android,
or create a build with EAS.
Next, copy
.env
and fill in your Bunny Stream credentials:
cp .env .env.local
Add your Bunny Stream values:
EXPO_PUBLIC_BUNNY_LIBRARY_ID=12345
EXPO_PUBLIC_BUNNY_API_KEY=your-library-api-key
Your API key is a secret. In a production app, proxy these calls through your backend or an API route so the key never reaches the client.
Then run:
# ornpx expo run:android
How Bunny Stream URLs work
Once a video has finished processing, Bunny Stream exposes it through predictable URLs built from your Pull Zone hostname and the video GUID.
| Resource | URL pattern |
|---|---|
| HLS playlist |
https://{pullZone}/{videoId}/playlist.m3u8
|
| Thumbnail |
https://{pullZone}/{videoId}/{thumbnailFileName}
|
| Animated preview |
https://{pullZone}/{videoId}/preview.webp
|
| MP4 fallback |
https://{pullZoe}/{videoId}/play_{height}p.mp4
|
| Captions |
htps://{pullZone}/{videoId}/captions/{lang}.vtt
|
The most important URL here is the HLS playlist. That is what
expo-video
plays. Because it is adaptive, the player can automatically choose the best quality for the current network conditions.
Using an edge script for secure API access
In this example, we do not call the Bunny Stream API directly from the app to fetch videos that we want to list in our app. Instead, we route all requests through a Bunny Edge Script.
Bunny Stream’s authentication model is designed around this pattern. The client requests access, your backend (or edge script) decides if it’s allowed, and returns the data needed for playback.
Example edge script
Below is an example of how you could create an edge script that proxies Bunny Stream:
serve(async (request) => {const url = new URL(request.url);// GET /videosif (url.pathname === "/videos") {const apiUrl = new URL("https://video.bunnycdn.com/library/1245/videos");apiUrl.search
= url.search;const res = await fetch(apiUrl.toString(), {headers
: {AccessKey
: BunnySDK.env.VIDEO_LIBRARY_API_KEY,},});return new Response(await res.text(), {headers
: { "Content-Type": "application/json" },});}// GET /videos/:idif (url.pathname.startsWith("/videos/")) {const id = url.pathname.split("/")[2];const res = await fetch(`https://video.bunnycdn.com/library/12345/videos/${id}`,{headers
: {AccessKey
: BunnySDK.env.VIDEO_LIBRARY_API_KEY,},});return new Response(await res.text(), {headers
: { "Content-Type": "application/json" },});}return new Response("Not found", { status: 404 });});
Talking to the Bunny Stream API
Now your Expo app talks to your edge script instead of bunny.net directly.
// lib/bunny.tsexport const PULL_ZONE = process.env.EXPO_PUBLIC_BUNNY_PULL_ZONE ?? "";export const API_BASE = process.env.EXPO_PUBLIC_API_BASE ?? "";export type BunnyCaption = { srclang: string; label: string };export type BunnyChapter = { title: string; start: number; end: number };export type BunnyMoment = { label: string; timestamp: number };export type BunnyVideo = {guid
: string;title
: string;description
: string | null;length
: number;width
: number;height
: number;views
: number;status
: number;thumbnailFileName
: string | null;thumbnailBlurhash
: string | null;captions
: BunnyCaption[] | null;chapters
: BunnyChapter[] | null;moments
: BunnyMoment[] | null;availableResolutions
: string | null;hasMP4Fallback
: boolean;};type ListResponse = {totalItems
: number;currentPage
: number;itemsPerPage
: number;items
: BunnyVideo[];};export async function listVideos(page
= 1,perPage
= 20,): Promise<ListResponse> {const url = new URL(`${API_BASE}/videos`);url.searchParams.
set("page", String(page));url.searchParams.
set("itemsPerPage", String(perPage));const res = await fetch(url);if (!res.ok) throw new Error(`API error: ${res.status}`);return res.json();}export async function getVideo(videoId: string): Promise<BunnyVideo> {const res = await fetch(`${API_BASE}/videos/${videoId}`);if (!res.ok) throw new Error(`API error: ${res.status}`);return res.json();}export function thumbnailUrl(videoId: string, fileName: string) {return `https://${PULL_ZONE}/${videoId}/${fileName}`;}export function hlsUrl(videoId: string) {return `https://${PULL_ZONE}/${videoId}/playlist.m3u8`;}export function formatTime(s: number) {const m = Math.floor(s / 60);const sec = Math.floor(s % 60);return `${m}:${sec.toString().padStart(2, "0")}`;}
Root layout
We only need two screens: a list screen and a detail screen.
// app/_layout.tsximport { DarkTheme, DefaultTheme, ThemeProvider } from '@react-navigation/native';import { Stack } from 'expo-router';import React from 'react';import { useColorScheme } from 'react-native';export default function RootLayout() {const colorScheme = useColorScheme();return (<ThemeProvider value={colorScheme === 'dark' ? DarkTheme : DefaultTheme}><Stack><Stack.Screen name="index" options={{ title: 'Videos' }} /><Stack.Screen name="video/[id]" options={{ title: '' }} /></Stack></ThemeProvider>);}
Building the video list
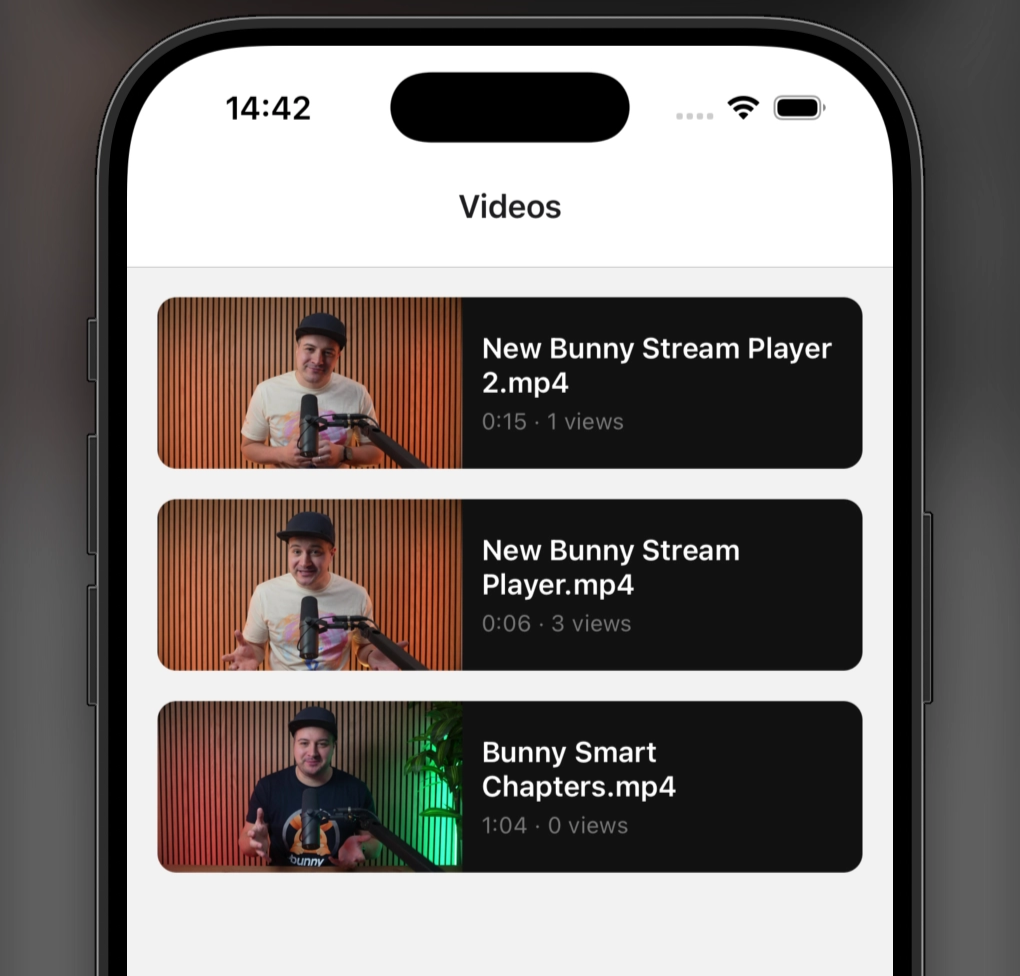
The home screen fetches your Bunny Stream library and displays a scrollable list of videos. Each row renders a thumbnail, a title, and a small metadata line. Tapping a card opens the native player screen for that video.
// app/index.tsximport { useEffect, useState } from "react";import {View,Text,FlatList,Pressable,ActivityIndicator,StyleSheet,} from "react-native";import { Image } from "expo-image";import { useRouter } from "expo-router";import {listVideos,thumbnailUrl,formatTime,type BunnyVideo,} from "../lib/bunny";export default function VideoListScreen() {const router = useRouter();const [videos, setVideos] = useState<BunnyVideo[]>([]);const [loading, setLoading] = useState(true);useEffect(() => {listVideos().
then((data) => setVideos(data.items)).
catch(console.error).
finally(() => setLoading(false));}, []);if (loading) {return (<View style={styles.center}><ActivityIndicator size="large" color="#FF6B00" /></View>);}return (<FlatListdata={videos}keyExtractor={(v) => v.guid}contentContainerStyle={styles.list}renderItem={({ item }) => (<Pressablestyle={styles.card}onPress={() => router.push(`/video/${item.guid}`)}><Imagesource={item.thumbnailFileName? { uri: thumbnailUrl(item.guid, item.thumbnailFileName) }: undefined}placeholder={item.thumbnailBlurhash? { blurhash: item.thumbnailBlurhash }: undefined}style={styles.thumbnail}contentFit="cover"transition={200}/><View style={styles.cardBody}><Text style={styles.title} numberOfLines={2}>{item.title}</Text><Text style={styles.meta}>{formatTime(item.length)} · {item.views} views</Text></View></Pressable>)}/>);}const styles = StyleSheet.create({center: { flex: 1, justifyContent: "center", alignItems: "center" },list:
{ padding: 16 },card:
{flexDirection:
"row",marginBottom:
16,backgroundColor:
"#111",borderRadius:
10,overflow:
"hidden",},thumbnail:
{width:
160,height:
90,backgroundColor:
"#222",},cardBody:
{flex:
1,padding:
10,justifyContent:
"center",},title:
{ color: "#fff", fontSize: 15, fontWeight: "600" },meta:
{ color: "#777", fontSize: 12, marginTop: 4 },});
This keeps the list simple, but it already feels like a real app: fast thumbnails, clean navigation, and no custom backend needed beyond the Bunny Stream API.
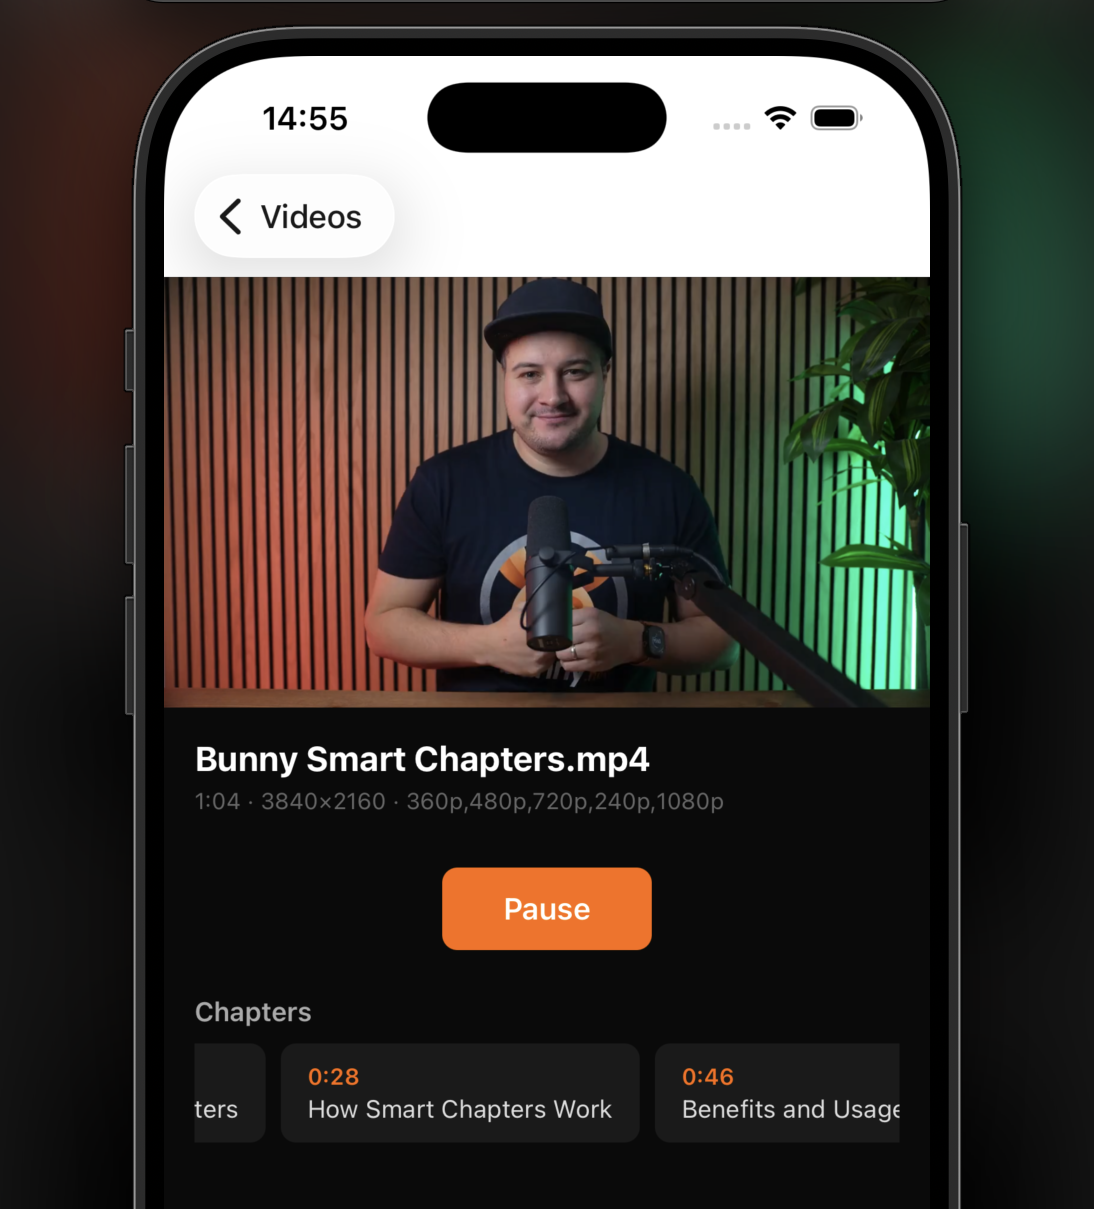
Playing a video natively
Now for the part that makes this approach worth using.

On the detail screen, we fetch the video metadata from Bunny Stream and hand the
HLS URL
to
expo-video.
Because playback is native, the player can integrate with the OS in ways a
WebView
cannot.
We also use
useWindowDimensions
for explicit sizing,
useEvent
for reactive playback state, and
useEventListener
to track progress while the video is playing.
// app/video/[id].tsx
import { useEffect, useState } from "react";
import { View, Text, Pressable, ScrollView, StyleSheet, useWindowDimensions } from "react-native";
import { useEvent, useEventListener } from "expo";
import { useVideoPlayer, VideoView, type VideoSource } from "expo-video";
import { useLocalSearchParams } from "expo-router";
import {
getVideo,
hlsUrl,
thumbnailUrl,
formatTime,
type BunnyVideo as BunnyVideoMeta,
} from "../../lib/bunny";
import { ChapterList } from "../../components/ChapterList";
import { CaptionPicker } from "../../components/CaptionPicker";
export default function VideoScreen() {
const { id: videoId } = useLocalSearchParams<{ id: string }>();
const { width } = useWindowDimensions();
const [meta, setMeta] = useState<BunnyVideoMeta | null>(null);
useEffect(() => {
getVideo(videoId).then(setMeta).catch(console.error);
}, [videoId]);
const source: VideoSource = {
uri
: hlsUrl(videoId),
contentType
: "hls",
metadata
: {
title
: meta?.title ?? "Loading…",
artwork
: meta?.thumbnailFileName
? thumbnailUrl(videoId, meta.thumbnailFileName)
: undefined,
},
};
const player = useVideoPlayer(source, (p) => {
p.timeUpdateEventInterval
= 1;
p.staysActiveInBackground
= true;
p.showNowPlayingNotification
= true;
});
const { isPlaying } = useEvent(player, "playingChange", {
isPlaying
: player.playing,
});
// Progress tracking: save to your backend here
useEventListener(player, "timeUpdate", ({ currentTime }) => {
// e.g. saveProgress(videoId, currentTime, player.duration)
});
return (
<ScrollView style={styles.screen}>
{/* Video player */}
<VideoView
player={player}
style={{ width, height: width * (9 / 16) }}
contentFit="contain"
allowsPictureInPicture
fullscreenOptions={{ enable: true }}
/>
{/* Info */}
{meta && (
<View style={styles.info}>
<Text style={styles.title}>{meta.title}</Text>
{meta.description && (
<Text style={styles.desc}>{meta.description}</Text>
)}
<Text style={styles.meta}>
{formatTime(meta.length)} · {meta.width}×{meta.height} ·{" "}
{meta.availableResolutions ?? "processing"}
</Text>
</View>
)}
{/* Play / Pause */}
<Pressable
style={styles.playBtn}
onPress={() => (isPlaying ? player.pause() : player.play())}
>
<Text style={styles.playBtnText}>
{isPlaying ? "Pause" : "Play"}
</Text>
</Pressable>
{/* Captions */}
<CaptionPicker player={player} />
{/* Chapters */}
{meta?.chapters && meta.chapters.length > 0 && (
<View style={styles.section}>
<Text style={styles.sectionTitle}>Chapters</Text>
<ChapterList chapters={meta.chapters} player={player} />
</View>
)}
</ScrollView>
);
}
const styles = StyleSheet.create({
screen
: { flex: 1, backgroundColor: "#0a0a0a" },
info
: { padding: 16 },
title
: { color: "#fff", fontSize: 18, fontWeight: "700" },
desc
: { color: "#999", fontSize: 14, marginTop: 4 },
meta
: { color: "#666", fontSize: 12, marginTop: 4 },
playBtn
: {
alignSelf
: "center",
backgroundColor
: "#FF6B00",
paddingHorizontal
: 32,
paddingVertical
: 12,
borderRadius
: 8,
marginVertical
: 12,
},
playBtnText
: { color: "#fff", fontWeight: "600", fontSize: 16 },
section
: { paddingHorizontal: 16, marginTop: 12 },
sectionTitle
: {
color
: "#aaa",
fontSize
: 14,
fontWeight
: "600",
marginBottom
: 8,
},
});
This is the tradeoff in practice.
You lose some of the convenience Bunny Player gives you automatically, but you gain real native playback behavior and full control over the experience.
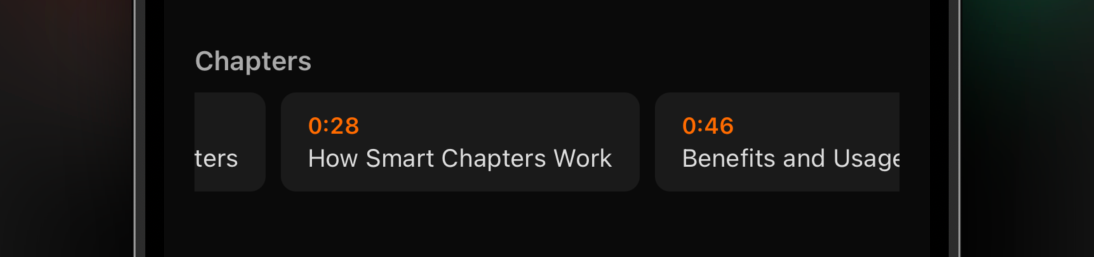
Adding chapter navigation
Bunny Stream returns chapter data as an array of objects with
title,
start, and
end
values in seconds. Because
expo-video
exposes a writable
currentTime,
chapter jumping is easy to implement.
The same pattern also works for Bunny Stream
moments,
using
moment.timestamp
instead of
chapter.start.
// components/ChapterList.tsx
import { FlatList, Pressable, Text, StyleSheet } from "react-native";
import type { VideoPlayer } from "expo-video";
import { formatTime, type BunnyChapter } from "../lib/bunny";
type ChapterListProps = {
chapters
: BunnyChapter[];
player
: VideoPlayer;
};
export function ChapterList({ chapters, player }: ChapterListProps) {
return (
<FlatList
horizontal
data={chapters}
keyExtractor={(c) => String(c.start)}
showsHorizontalScrollIndicator={false}
renderItem={({ item }) => (
<Pressable
style={styles.chip}
onPress={() => {
player.currentTime = item.start;
if (!player.playing) player.play();
}}
>
<Text style={styles.chipTime}>{formatTime(item.start)}</Text>
<Text style={styles.chipTitle}>{item.title}</Text>
</Pressable>
)}
/>
);
}
const styles = StyleSheet.create({
chip
: {
backgroundColor
: "#1a1a1a",
borderRadius
: 8,
paddingHorizontal
: 14,
paddingVertical
: 10,
marginRight
: 8,
},
chipTime
: { color: "#FF6B00", fontSize: 12, fontWeight: "600" },
chipTitle
: { color: "#ddd", fontSize: 13, marginTop: 2 },
});
Wiring up captions
Bunny Stream includes subtitle tracks in the HLS manifest. After the player source loads,
expo-video
exposes
availableSubtitleTracks
and lets you set
subtitleTrack
directly.
That means you can build a simple caption selector with native track switching and no
WebView
bridge in the middle.
// components/CaptionPicker.tsx
import { useState } from "react";
import { Pressable, Text, View, StyleSheet } from "react-native";
import { useEventListener } from "expo";
import { type VideoPlayer, type SubtitleTrack } from "expo-video";
type CaptionPickerProps = {
player
: VideoPlayer;
};
export function CaptionPicker({ player } : CaptionPickerProps) {
const [tracks, setTracks] = useState<SubtitleTrack[]>([]);
const [active, setActive] = useState<SubtitleTrack | null>(null);
useEventListener(player, "sourceLoad", ({ availableSubtitleTracks }) => {
setTracks
(availableSubtitleTracks);
});
const select = (track: SubtitleTrack | null) => {
player.subtitleTrack
= track;
setActive
(track);
};
if (tracks.length === 0) return null;
return (
<View style={styles.row}>
<Pressable
style={[styles.chip, !active && styles.chipActive]}
onPress={() => select(null)}
>
<Text style={styles.chipText}>Off</Text>
</Pressable>
{tracks.map((t) => (
<Pressable
key={t.language}
style={[
styles.chip
,
active
?.language === t.language && styles.chipActive,
]}
onPress={() => select(t)}
>
<Text style={styles.chipText}>{t.label}</Text>
</Pressable>
))}
</View>
);
}
const styles = StyleSheet.create({
row
: {
flexDirection
: "row",
gap
: 8,
paddingHorizontal
: 16,
marginBottom
: 12,
},
chip
: {
backgroundColor
: "#1a1a1a",
borderRadius
: 6,
paddingHorizontal
: 12,
paddingVertical
: 6,
},
chipActive
: { backgroundColor: "#FF6B00" },
chipText
: { color: "#fff", fontSize: 13 },
});
Project structure
Here is the final structure for the example app:
├── app/
│ ├── _layout.tsx # Root Stack navigator
│ ├── index.tsx # Video list: fetches library, navigates to detail
│ └── video/
│ └── [id].tsx # Video detail: native HLS playback with metadata
├── components/
│ ├── ChapterList.tsx # Tappable chapter chips
│ └── CaptionPicker.tsx # Subtitle track picker
└── lib/
└── bunny.ts # Types, API client, URL helpers
It is a small project, but it covers the pieces most real apps need: browse videos, open a detail page, play natively, expose captions, jump between chapters, and track playback progress.
You can find the full source code of the demo app on GitHub.
Choosing the right playback approach
bunny.net gives you a few different ways to play Bunny Stream videos, and the right choice depends on how much control you need.
Bunny Player
is still the fastest path. If you want to ship quickly and do not need deep native media integration, embedding it in a
WebView
lets you drop in a complete player without building controls or playback logic.
Bunny Stream iOS SDK and Bunny Stream Android SDK are the native-first option. They include built-in analytics, dashboard-controlled branding, TUS upload support, and camera capture, but they are designed for Swift and Kotlin apps rather than Expo’s managed workflow.
expo-video
+ Bunny Stream API sits in the middle. You keep Expo compatibility, gain access to native playback behavior, and build your own UI around Bunny Stream’s HLS playback and metadata APIs.
| Feature |
Bunny Player (WebView)
|
Bunny Stream native SDKs |
expo-video + Bunny Stream API
|
|---|---|---|---|
| Expo compatible | Yes (WebView) |
No (Swift/Kotlin only) | Yes (development build) |
| Setup complexity | Embed URL in a WebView |
SPM or Maven dependency | Development build required |
| Native controls | No (web controls in WebView) |
Yes | Yes |
| Picture-in-Picture | WebView cannot surface to OS |
Yes | Yes |
| Background audio | WebView cannot surface to OS |
Yes | Yes |
| Lock screen / now playing | WebView cannot surface to OS |
Yes | Yes |
| Programmatic playback control | Via postMessage bridge | Direct API on player instance | Direct API on player instance |
| Progress tracking | Via Player.js in WebView |
Built in | Native timeUpdate event |
| Chapters / moments UI | Built in | Dashboard controlled | Build your own from API data |
| Built-in analytics | Yes | Yes | No (roll your own) |
Which one should you use?
If all you need is reliable video playback inside an Expo app, start with Bunny Player.
It is faster to integrate, easier to maintain, and for many use cases, it is more than enough.
But when your app needs to behave like a real native media app, with Picture-in-Picture, background playback, lock screen controls, and tighter control over the playback experience, native playback is the better fit.
That is where
expo-video
and Bunny Stream work well together.
Bunny Stream gives you the delivery, metadata, captions, chapters, and adaptive HLS playback.
expo-video
gives you native player access inside Expo. Together, they let you build a video experience that feels fully at home on the platform instead of living inside a
WebView.